This warning is a new security feature that Apple added to Mojave. Basically, the OS asks you if you want to allow DPC to access and works with your files - a necessary permission to scan your Mac for duplicate and similar images. Simply click on "Allow" and no further action will be required.
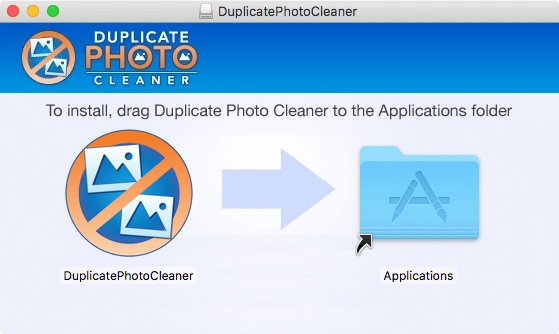
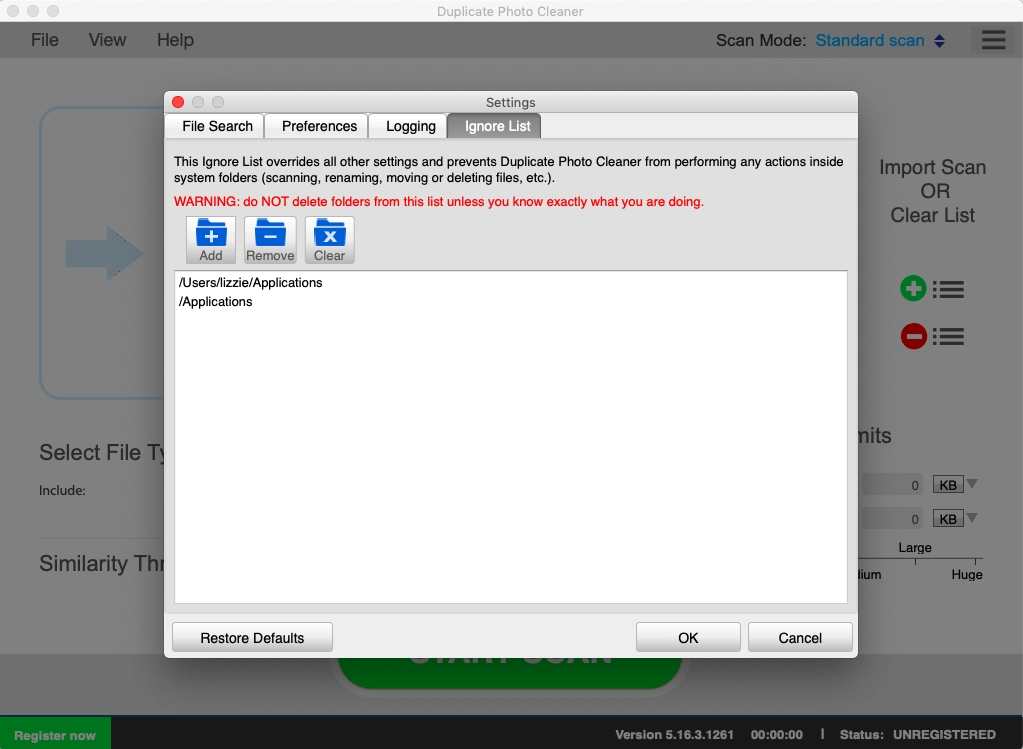
You'll need to add these folders to the Ignore List. To do that, go to Settings, click on the Ignore List tabs and add the folders you want to exclude from scans.
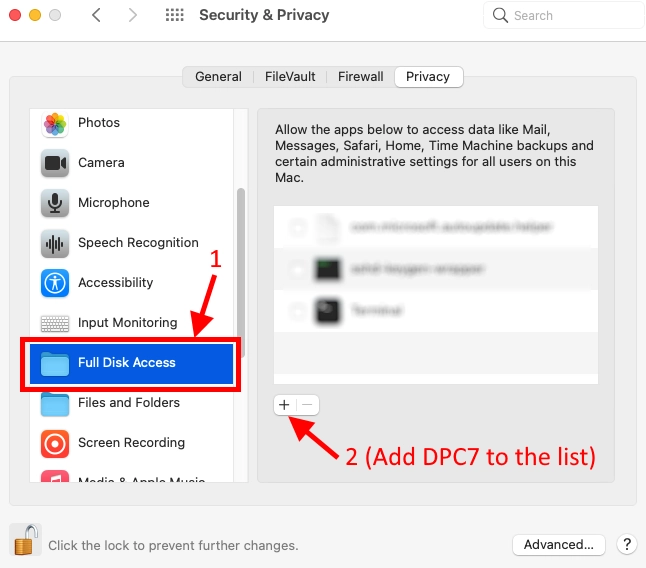
If you are running macOS Mojave (10.14) or higher, you need to enable Full Disk Access on your Mac to ensure Duplicate Photo Cleaner works correctly.
Full Disk Access is a privacy feature that Apple introduced in macOS Mojave (10.14) and it prevents downloaded apps from accessing your important data, such as Mail, photos, Safari, etc., without getting the green light from you. Duplicate Photo Cleaner has scan modes that require access to various files, including your Mac Photos library, and that's why you'll need to manually grant permission to make sure DPC can scan all your photos and images for duplicates and similars.
If this option is turned off, each automatic selection will replace the previous one by clearing the selection and applying the new one. If this option is turned on, each auto-selection will add to the previous one (selection will not be cleared).
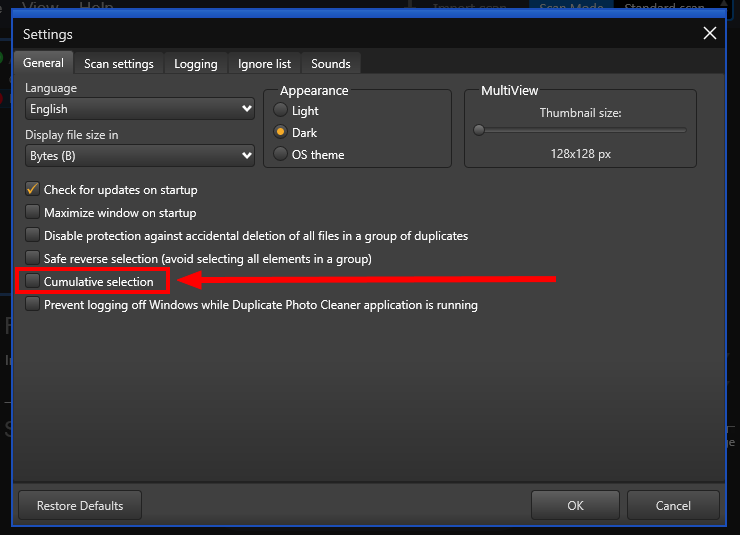
Turn OFF the cumulative selection.
Turn ON the cumulative selection.
The trial version of Duplicate Photo Cleaner offers unlimited scanning for duplicates and similar images. You can then delete up to 10 duplicate groups with the trial version.
Please log into your account from this page. To the right of your license key, you'll see two links - to renew and to upgrade. Click on the Upgrade button and follow the prompts.
If you ever need to reinstall Duplicate Photo Cleaner or move it to a different computer, you should copy your license key and unregister the program before you do anything else. To do that click on "Help" and go to the "About" screen inside the program. Then make a note of your license key and remove the key. This will reset the license so that you can reactivate it on a new installation (this feature is limited to 3 times).
Note: if your license key has expired, please visit the Version History page on the site and download the version that was released before your key expired. An expired key will not activate any version released after the key's expiration.
Follow these steps to activate Duplicate Photo Cleaner on a computer that's not connected to the Internet:
If you're on Windows, you can ask the Support Team to email you a Master File that you can save to the folder where Duplicate Photo Cleaner is installed. Then simply open Duplicate Photo Cleaner and it will get activated.
Duplicate Photo Cleaner supports BMP, JPG, JPEG, JFIF, PNG, TIF, TIFF, GIF, ICO, WMP, ICNS, PSD, TGA, RAW, CRW, CR2, CR3, NEF, PEF, RAF, X3F, BAY, ORF, SRF, MRW, DCR, SR2, DNG, RW2, ARW, HEIC, HEIF, 3FR, DCX, DIB, EMF, JPS, HDP, PBM, PGM, PNS, PPM, PCT, CUR, WEBP, BAY, ERF, KDC, RWL, MEF, NRW, PTX, SRW, RLE, DDS, WDP, JXR, HDP, JPE, JIF, J2K, JPC, J2C, JP2, PCX, SVG, DCM, DIC, DICOM and V2.
All you need to do is set the image similarity threshold to 100%. To do that, open the program and click on Settings. In the new window go to the File Search tab and move the image similarity threshold slider to 100%. Click OK to save your settings.
If you don't want Duplicate Photo Cleaner to load every time you start your computer, go to Settings - Preferences and uncheck Launch Start Dialog on Startup. Click OK to save your settings.
Setting the scan results view to tree view will make the program display information like image width and height, size and modification date in addition to image location. To change your view settings to tree view, click on the View result menu item and select as Tree.
Simply go to program settings, navigate to the File Search tab and uncheck BMP, GIF and PNG. Click OK to save your settings.
Comparing photos in grayscale will help you get more matches without lowering the image similarity threshold. When you search for duplicate and similar photos in grayscale as opposed to in full color, Duplicate Photo Cleaner disregards color changes. This method allows you to find more duplicate photos and more similar images you may want to move or delete.
To compare photos in grayscale, go to Duplicate Photo Cleaner settings and check "Use grayscale comparison" on the File Search tab.
Yes, absolutely. To find and delete duplicate images from your Photos or iPhoto library, open Duplicate Photo Cleaner and select Photos or iPhoto scan mode in the top right corner of the software window. Photos or iPhoto will open and you'll be offered to select the folders you want to scan for duplicates. When done, start the scan and wait for Duplicate Photo Cleaner to find all the duplicates.
Deleting duplicates is safe because they are put in iPhoto or Photos trash and you can restore them if you want to.
Sector Detail Scan is a scan mode introduced in Duplicate Photo Cleaner 2.8. This mode lets you select a sector on an image and search other images for that particular sector. Here is how to use it:
Because Sector Detail Scan is very precise, it can take several hours to complete the scan. To make your scans faster, we suggest that you set the similarity threshold to 50% and scan smaller folders.
Both Easy Duplicate Finder™ and Duplicate Photo Cleaner are designed to find and delete duplicate files. The main difference between these two apps is that Easy Duplicate Finder™ works with duplicates of all file types, whereas Duplicate Photo Cleaner works with images only. In addition to that, Easy Duplicate Finder™ can only find exact duplicates. Duplicate Photo Cleaner is different because it can detect both identical and similar images, such as resized and edited photos. It can also find photos in different formats (a .JPG file vs. a .PNG file, for example).
If you are having trouble choosing between Easy Duplicate Finder™ and Duplicate Photo Cleaner, ask yourself what types of duplicates you want to find. Easy Duplicate Finder™ is ideal if you want to delete duplicate documents, songs, photos, emails and videos from your computer. But if all you want to do is organize your extensive image library, consider getting Duplicate Photo Cleaner. It will not only help you find and delete duplicate photos, but also let you easily sort through similar shots and decide which ones to keep and which to delete or move.
You can select images you want to delete in bulk on the Scan Results screen. Use the "Select Photos" drop-down menu to select all duplicates, select all originals, or select only high or low-resolution images.
To delete several files in one go, select the files you want to delete and then click on the trash can icon in the top right corner of the app screen.
If you have a very large photo library, follow these steps to make deleting duplicate and similar photos as efficient as possible:
Simply go to the Scan Mode drop-down menu and choose Folder Comparison. Then add a source folder to the left drag & drop area and Duplicate Photo Cleaner will treat files in this folder as the originals. Then add the folders you want to compare against the source folder to the target scan area to the right and run a scan. When done, use Duplicate Photo Cleaner to delete the duplicates as you normally would.
The Folder Comparison mode is a special scan mode that makes it easy to compare images in two or more folders. It treats files in Source Folders as originals (master files), thus helping you to avoid any confusion when you're choosing which photos to delete and which to keep. This mode is great for comparing files on external drives with images on your computer and merging folders.
When you are using most scan modes, Duplicate Photo Cleaner considers the first image in a group of duplicates the original file.
When you switch to the Folder Comparison mode, all the files in the Source Folder(s) are treated as the originals, while the photos in target folders are marked as the duplicates.
In Sector Detail Scan mode, the source image file is the original.
This feature makes Duplicate Photo Cleaner use all available CPU cores for image processing. Enabling this feature makes the scan up to 50% faster.
Duplicate Photo Cleaner uses an advanced algorithm to compare the actual images, just like a human would. Depending on the program settings, it may take EXIF data into account when determining image similarity level.
Duplicate Photo Cleaner supports Adobe Lightroom 6 and newer. If you have an older version on your computer, the Lightroom Scan mode will not appear in the Scan Modes menu.
The Search / Filter results feature offers you a handy way to go through the scan results and manage your photos more effectively. You can open the Search / Filter window by clicking on the "Search" icon in the bottom right corner of the results window.

The search tool lets you search / filter files by name, by date, by size, and by duplicate group.
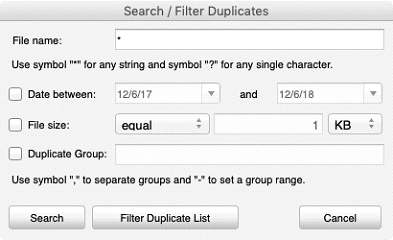
The file name field allows you to use wildcard characters where an asterisk (*) represents one or more characters and the question mark (?) represents a single character.
The asterisk in a wildcard matches any character that appears zero or more times. For example, "comp*" matches anything beginning with "comp" which means "comp," "complete," and "computer" are all matched.
The question mark stands for a single character mentioned only once. For example, "c?mp" could be either "camp" or "comp".
You can use this feature and wildcard characters to search DPC scan results quickly and effectively to find the images you need.
There are two ways for you to save scan results to a file for later use.
Option 1:
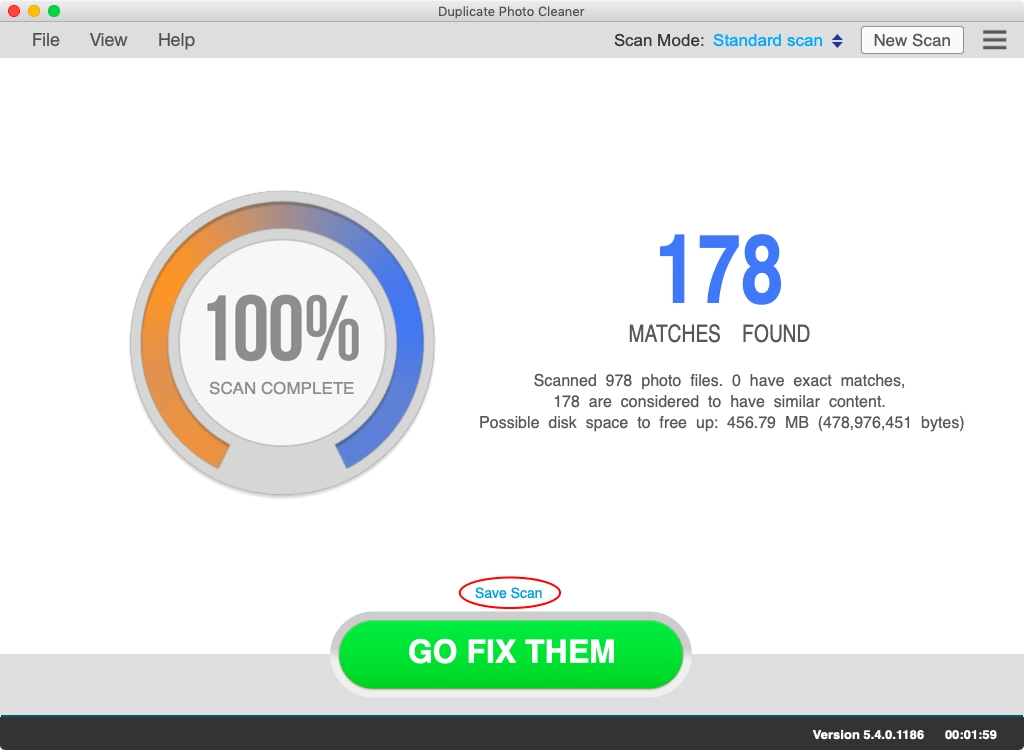
Option 2:
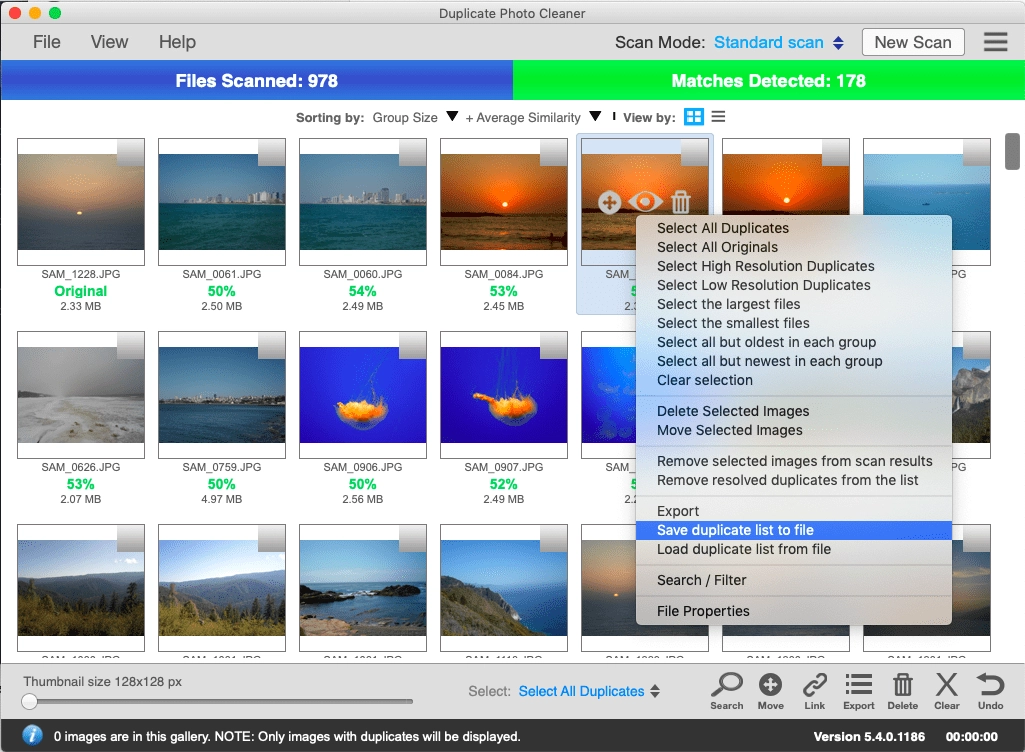
Now you can load the results directly from the list - that will save you a lot of time, especially if you save a scan of a large photo collection.
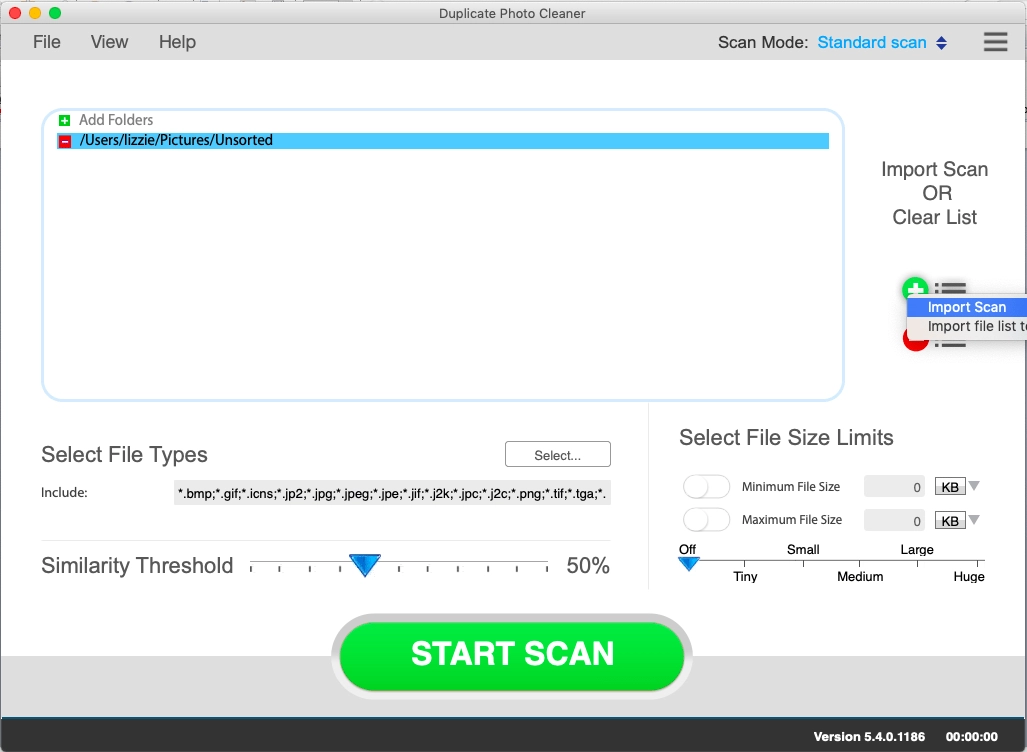
To import an exported scan, open Duplicate Photo Cleaner, click on the green plus button, select Import Scan and browse to the list file saved on your computer.
Yes, you can! Simply connect your phone to your Windows PC and open Duplicate Photo Cleaner. It will automatically detect a connected phone and offer to scan it for duplicate and similar photos. Alternatively, open DPC, select Media Device Scan from the scan modes drop-down menu and connect your phone. Your phone may ask you to give Duplicate Photo Cleaner the necessary permissions (check your phone for notifications). When done, follow Duplicate Photo Cleaner's prompts to scan your phone.
You can use DPC to scan your iOS and Android devices for duplicate and similar photos by connecting your phone to your Windows PC and using DPC's Media Device Scan mode.
No, you don't need to add folders one by one. Duplicate Photo Cleaner uses the Media Transfer Protocol to scan photos on your smartphone, which means that all you need to do is connect your phone and DPC will detect and scan all the photos on the device.
DPC sees an image as the original based on a set of conditions. Here they are in order of priority:
If your scan with Duplicate Photo Cleaner got stuck or is very slow, don't panic because most likely it's not a bug. This could be happening because you've chosen a very accurate scan mode and added too many images for Duplicate Photo Cleaner to compare. Just stop your current scan and try the following:
This will help you speed up Duplicate Photo Cleaner scans and manage your photos more effectively.
Most likely, your computer needs you to run the installer as Administrator. Here is how you can do that:
Duplicate Photo Cleaner doesn't save your scan progress automatically but it offers you an option to pause and resume scans.
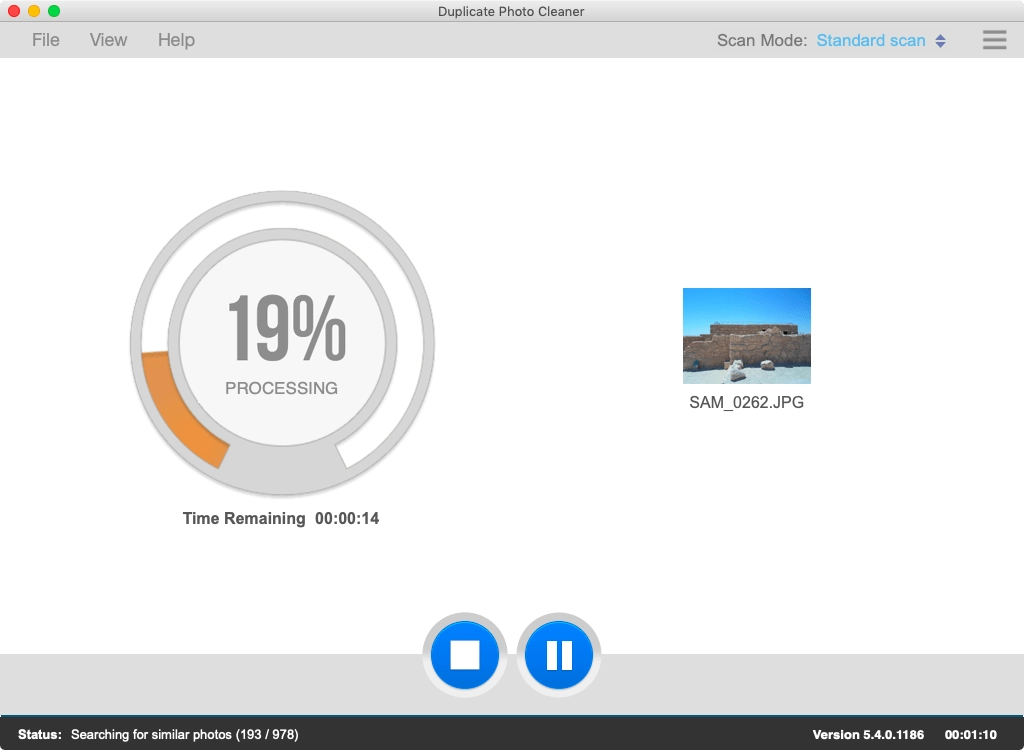
If you've paused a scan, DPC will resume it right where it left off even if you've closed the application.
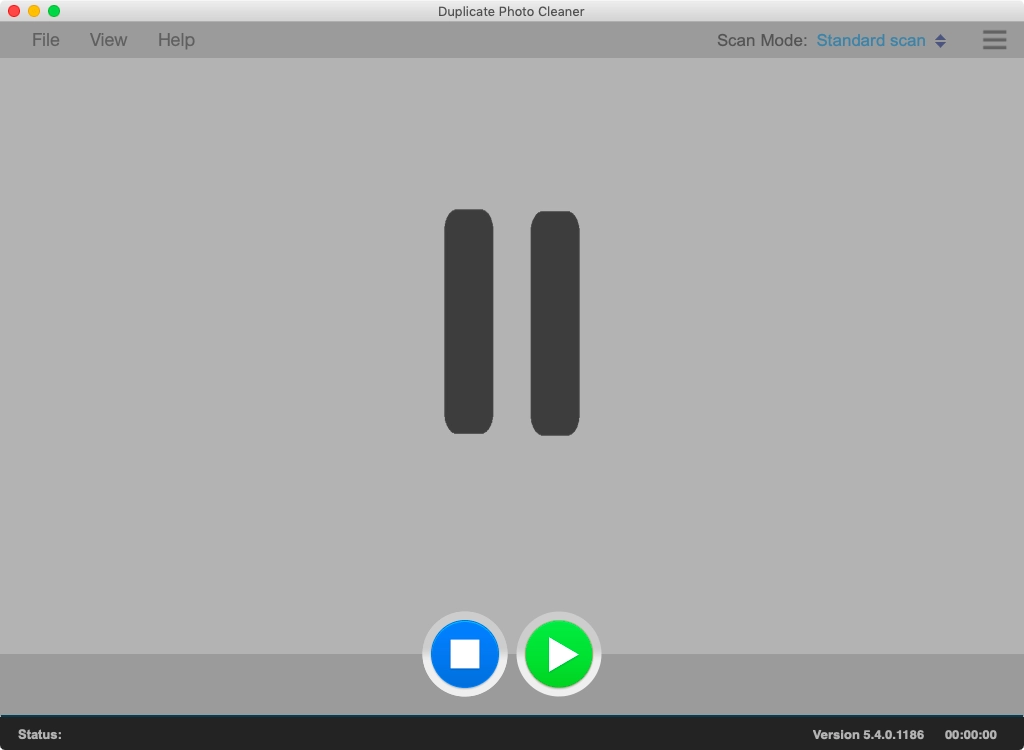
We recommend that you use the Pause feature if you decide to abort a scan because you don't have the time to sort through the results. This will speed things up a great deal.
First of all, go to www.duplicatephotocleaner.com, download the .exe (Windows) or .dmg (Mac) installation file and install Duplicate Photo Cleaner. If you have a license key, you can log into your account with the email address used when you purchased your license key from this page. There you will see your current license key. You can also find your license key in the email we sent you when you purchased Duplicate Photo Cleaner. Use the key to activate Duplicate Photo Cleaner by running the program and entering the license key in the activation box.
If you discover that your license key has expired, make sure you go to the "Version History" page and install an older version, the one for which you bought the key. Duplicate Photo Cleaner will work as it should, although you won't be able to download updates. Your key should activate any version released prior to your software expiring.
If you lost your license key, please submit a support ticket and send us all the relevant information about your purchase.
Duplicate Photo Cleaner supports large amounts of files and works on large drives. Please make sure your drive is not damaged and doesn't have bad sectors. Also please make sure you have the latest version of Duplicate Photo Cleaner installed. You can check for new versions by opening the program, clicking on Help in the menu and clicking on Update.
There could be several reasons why Duplicate Photo Cleaner is not deleting these files. Here are the most common fixes for this problem:
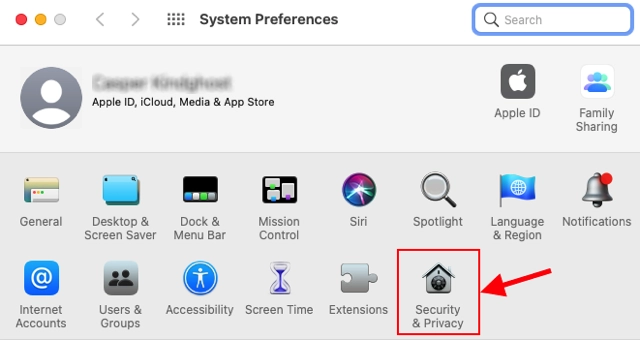
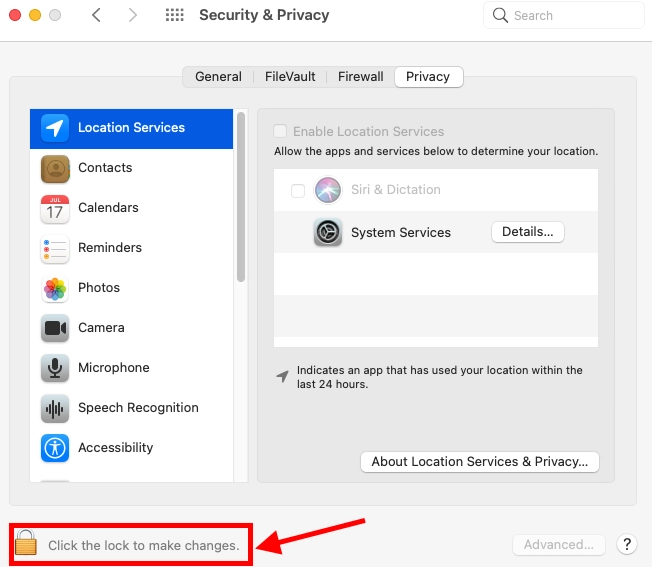
Most likely, that's happening because your Mac settings are preventing apps from third party developers from running on your computer. Changing the settings will help. To do that, click on the Apple menu and select System Preferences. When the System Preferences window opens, go to Security & Privacy. On the General tab click on the lock to be able to make the changes and enter your password. Under "Allow apps downloaded from:" select "Mac App Store and identified developers" or "Anywhere". Now you should be able to open Duplicate Photo Cleaner.
Yes, Duplicate Photo Cleaner is compatible with Windows XP even though it's designed to work on the newest operating systems to ensure highly accurate results and great performance. However, Windows XP is an outdated OS and even Microsoft stopped supporting it. That's why some users may experience problems using the latest versions of Duplicate Photo Cleaner on XP. If that's the case with you, we suggest you download the following version:
Absolutely! Duplicate Photo Cleaner supports Windows tags. Simply scan your image library and wait for the results to be displayed. You can hover over image thumbnails in Multiviewer to view EXIF data and Windows tags. When you are ready to select the images based on Windows tags, use the "Select files with tags" and "Select files without tags" bulk selection options.
Yes. Duplicate Photo Cleaner supports Windows context menu, so all you need to do is right-click on a folder you want to scan and select Duplicate Photo Cleaner.
This warning is a new security feature that Apple added to Mojave. Basically, the OS asks you if you want to allow DPC to access and works with your files - a necessary permission to scan your Mac for duplicate and similar images. Simply click on "Allow" and no further action will be required.
The easiest way to stop these popups is to give DPC full disk access. Here is how:
This means that DPC couldn't identify the original for these groups. When DPC cannot determine the original file in the group because all files match the same criteria (i.e. have the same file name), it will not select any files in the group. You can still use bulk selection options that use different criteria.
That's because the "Reverse selection" option changes the selection to the opposite state (selected -> non-selected, non-selected -> selected)